


Frequently Asked Questions
Last Update: 05-04-2002
1.1 Introduction 1.2 System Specifications 2.1 Defender 2.2 Space Force 2.3 Super Cobra 2.4 Turtles 3.1 Troubleshooting 4.1 Contributors 5.1 Disclaimer
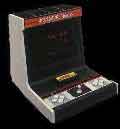
1.1 Introduction: The Adventure Vision was manufactured by Entex Industries, Inc. in 1982 with a total "in-production" time of 1 year and a total distribution of between 50,000 and 100,000 systems. The gaming system is cartridge based and includes only four titles in it's software library; Defender(pack-in), Space Force, Super Cobra, and Turtles. The video display is created using one vertical row of 40 red LEDs and a spinning mirror to achieve total screen resolution of 150 x 40. The system is plagued by a screen "flicker" due to the spinning mirror and the system's relatively low refresh rate of 15 frames/sec. Because of these limitations, the system is best played in a dimly lit environment, with optimal results obtained in total darkness.
1.2 System Specifications: System Processor: Intel 8048 microprocessor 1K internal ROM 1K external ROM (4K maximum) 64 bytes internal RAM System Processor Speed: 933.33KHz Sound Co-Processor: National Semiconductor COP411 4-bit/8-bit* microcontroller 512 bytes internal ROM 32 - 4-bit internal RAM locations Sound Co-Processor Speed: ??? UNKNOWN Video Display: 150 x 40 @ 15Hz Sound: Amplified Mono w/ Headphone Jack Controller: 1 four-way joystick 2 sets of 4 buttons(for left/right handed players) * - Instructions are 8-bits wide, but the COP411 can only handle 4-bit wide data.
2.1 Defender: Defender is a direct port of the arcade game. Smart bombs, hyperspace, thrust, and firing all made it into this game.
2.2 Space Force: Space Force can be described in one word: Asteroids. It is a pretty good translation except for one fatal flaw... the game gets too hard in a short amount of time. What is worse is that there is a small programming bug where once you die, your new ship never gets a chance to come out. Basically it's GAME OVER.
2.3 Super Cobra: Super Cobra is another arcade port and all 10 levels have made it into this extremely fun. But even better than the arcade game is that you can start the game with an infinite number of lives! You are almost guaranteed to see every level(if you try hard enough). ;o)
2.4 Turtles: Entex did good in the fact that all four games were arcade game licensed. The Turtles arcade game was manufactured by Stern and the Adventure Vision version is at least as good. Every last cutesy little tune is here and boy is it fun. Turtles has been called the best game available for this system by more than one gamer and I definitely agree.
3.1 Troubleshooting: The Adventure Vision is a pretty basic electronic device. Since it does not use a cathode ray tube, or CRT, for a display, there are no voltages higher than 5VDC. This is great for the nontechnical oriented person who would like to attempt a repair. Common sense and a little experience with soldering and de-soldering are about all that is needed to attempt most repairs. A grasp of basic electrical theory would also be helpful. The following repairs are in order from easiest to most difficult. Most of them require the disassembly of the system. I will leave the actual disassembly up to you, just work slow and use common sense when taking it apart. 1. Clean cartridge slot contacts The contacts are easily cleaned by using a soft pencil eraser. Just "erase" each contact to get the oxidation off. You'll be surprised at how much gunk the eraser will have, most of the time you will need to clean the eraser after only a couple contacts. 2. Clean cartridge contacts This is similar to the above. I found it easier to remove the chip from the cartridge case. Just be careful if you decide to go this route, I BROKE the plastic piece the first time I tried it. (Hey, I though my system was dead so I had nothing to loose) 3. Clean control panel contacts This one takes some guts to do. You must take apart your system in order to get to the contacts. I will not discuss the "how-to's" of the actual disassembly, but I will again say, use CAUTION. After you have gotten to the contacts, just use that eraser again. 4. Reflow cartridge slot solder Again, this requires disassembly of the system. Both my systems had cracks in the solder for the cartridge slot. The best fix for this is to remove the old solder and resolder with new. This is known as reflowing. 5. Reflow ribbon cable solder Very similar to #4 except you are working with the two ribbon cables that go to the display pcb and the controller pcb. 6. Sound problems For any sound problem, be sure to check the ribbon cable that runs between the main PCB and the joystick PCB. One of my systems had problem where the sound would cut in and out, the problem was traced back to a cold solder joint on the controller PCB to the ribbon cable. (see #4 above for remedy) 7. Display problems For any display problems(ie. missing or weak horizontal lines), be sure to check the ribbon cable that runs between the main PCB and the display PCB for cold solder joint. (see #4 above for remedy)
4.1 Contributors: * Dan Boris * Garth "Tony" Clowes
5.1 Disclaimer: DISCLAIMER: The contributors of the Adventure Vision FAQ do not take any responsibility for you breaking your system when attempting repairs/upgrades. PLEASE, if you do not feel comfortable doing anything mentioned in this FAQ do NOT do it.
Back:System Info